What Are The Differences Between Personal and Business Pinterest Accounts?
While there may not be any noticeable differences between the two, Pinterest has added a few benefits to companies and people aiming to use Pinterest as a part of their marketing. These include the following:
Pinterest Business Names Vs. Personal Names
While individuals must fill in both their given and surnames, businesses are given one field to fill out. You won’t have to split your business name into two parts.
Beginner’s Tips Designed For Influencers and Businesses
Pinterest has an area on its website that provides educational materials to teach influencers and businesses how to market themselves. Even taking the time to learn the basics of the platform can give you an edge over competitors.
Allow People to Add Your Web Pages to Pinterest
When people organically land on your site, give them the option to share your content on Pinterest. Allowing others to post your content to the platform will broaden your reach to their friends and followers, which could potentially drive further traffic to your brand.

How to Set Up a Pinterest Business Account
To set up a Pinterest Business Account, go to their business page and click the “Sign Up” button in the upper right-hand corner. Insert your business email and choose a strong password. You will be taken to a page where you will be able to set up your first pin, with tips and ideation for what you should include. If you want to skip this step, click the X in the upper right-hand corner.
Converting an Existing Account
If you accidentally created a personal account for your business, simply login to your account from the business page and follow the steps. From there, you can go to your settings to correct your business name (if necessary).
What You’ll Need to Submit
When setting up your account, you’ll need to provide the following information:
- Your business name
- Your business type
- (Optional) your business email
- (Optional) your business website
You will also be asked to choose at least 1 category/topic that is representative of your business or brand and express your interest in advertising.
Set Up Profile
The first thing you’ll want to do as a Pinterest business user is to add a picture and information about your profile that identifies with your brand. To do this, go to your account settings, then the “Claim” option. You will be given the code that you can add to your website.
If you have a website, claim it so that you receive attribution for any pins. You should also link your Instagram, Etsy, or YouTube pages (where applicable).

How to Add Your First Pin on Pinterest
Though you will eventually be able to add several pins at once, I recommend you create your first few individually so that you fully understand the process. You will be more likely to find innovative ways to grow your business in the future in this way.
If you skipped the “Create Your First Pin” board when you first created your account, I saved a screenshot for you that includes the tips Pinterest provides. Over time, you learn little hacks that will work for your particular brand.
Step 1

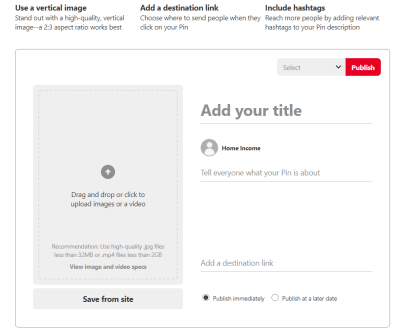
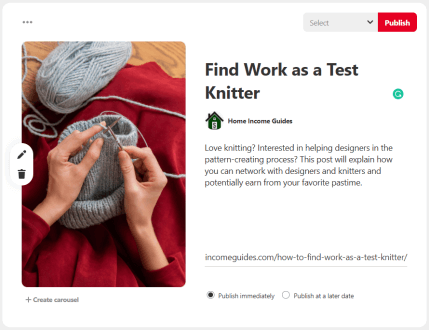
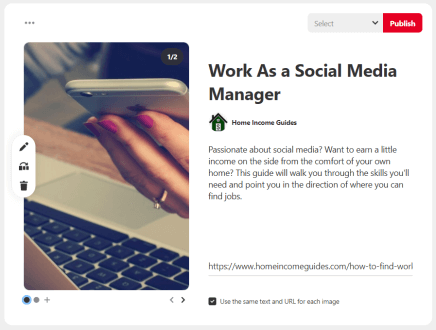
To create your first pin, click the red plus sign in the upper right-hand corner of the screen. Pinterest will walk you through each step as you create your first Pin. You will need to add:
- Title and description of your post – keep these short and sweet if possible.
- Destination link – to the product or posting to which you want to direct your traffic
- Image or Video – note that the video will not have sound. If you want to edit the image from Pinterest, you’ll need to upload it instead of porting it from your site.
Step 2

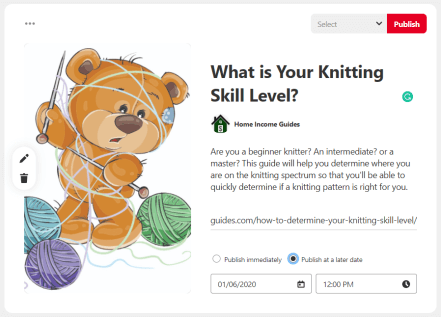
Once you have inputted the required information, you can select the option to either publish immediately or at a later date.
Step 3

If you choose to publish at a later date, you’ll need to input the date and time that you’ll want to publish in the provided spaces.
Step 4

You can also choose to add a carousel to your posts. Click the option beneath the image to add more images to the same pin.
Step 5

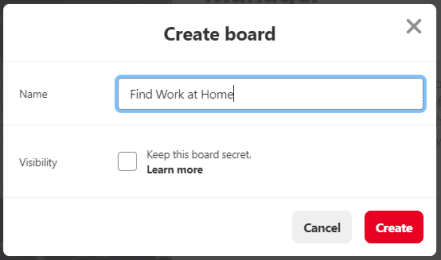
When you have finished creating your pin, press the “Select” button at the top of the pop-out menu. This will give you the option to create a board, which is the category on your profile where your pin will be stored. For instance, if you sell jewelry, you can have separate boards for your necklaces, rings, and bracelets. Later, you’ll be able to add sections (sub-categories) to each board to help people navigate even further.
Step 6

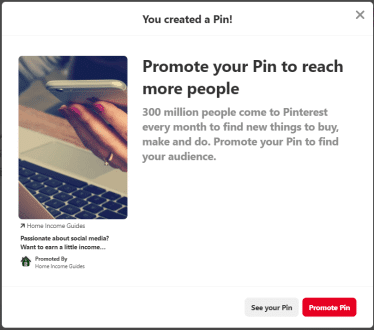
Once you have added the board, you can publish your pin by clicking the red “Publish” button at the upper-right side of the box.
Create Group Boards to Add Your Business Partners
Luci and I manage several websites together and we have found that, in most cases, it is simpler for one of us to “own” an account and add the other as a creator or an admin. Pinterest is no different. If you have business partners who will also create and manage pins, create group boards and add them as contributors. That way, you can split duties and accomplish more on a weekly basis.
Add Widgets to Your Site
To help grow your Pinterest following, consider adding widgets to your website or blog. They are customizable so that you can work with your overall style. You can also add a save button to help them spread the work alongside you.

